In case you don't know, I'm a model lakeboat builder. Those of us who are AD/HD must always be doing something, and through the years of my aviation education and career, this was my outlet, relaxation and distraction... it kept me sane. In college some of the guys called me "Geppetto" because I'd come home on my bicycle with a few sheets of balsa wood, go into my room and as over the weeks, they walked by and looked in the sheets would turn into cuttings and soon a lake freighter would arise from the cuttings. This is the tale of how one such boat was wrecked and needed major reconstructive surgery.
I hadn't worked on one the boats to this extent in 20 years... do I still have the "touch"?

 |
| Far away from shore on Lake Huron. This is not the best photo, it was take by my late father and his pictures were often out of focus. He told me at the time that she was sinking because in the distance she looked low in the water. "This is the last you'll see of her," he said. |
Later I carried her down to Florida and parked her as a display at my father-in-law's condo in Jacksonville. I Left the radio equipment there too because his condo had a terrific pond behind it. When we'd visit him I'd take her for a run. After our kids were born they liked to watch... not because they liked the boat, but because they were tickled by the fact that the minnows chased after the propeller.
In 2018, my father-in-law contracted Alzheimer's and had to move from Florida to Maryland and live with us. When the movers packed his belongings they took the KEYSTONE and just chucked her into a box! When his stuff arrived here, I opened the box and was horrified to see that they had shipped me a shipwreck. The KEYSTONE was smashed up pretty bad.


Her stack was shipped and her rails had been impacted on both sides.

Aft, her starboard rail was crushed as was the overhang of her cabin..

Although her rails were dented, her hull was remarkably undamaged. I only found one longitudinal crack that was easily mended with some CA (cyanoacrylate, or "super glue"). It appears as if my use of those pine stir sticks rather than sealed balsa wood saved the her hull.She only had external damage. Also her propeller and rudder were in good shape, *whew*

Most challenging would be the bow and the bridge wing.
To the workbench we would go and make good use of the COVID lockdown.

One good thing was that her movable steering pole had broken off in one piece. It would go back on easily.

I decided to do the easy stuff first, just to give me confidence- so the aft work went ahead. The sprung fence rail was an easy fix. I started by fitting it right where it had been and clamping it in place.

Then I lifted the smashed deckhouse overhang back into place and CA'd it. Next I clamped every other post and CA'd the ones in between.

The aft most post could be bent back into position, but the two outward of it were too badly damaged and had to be removed. I've been working these little metal posts for 35 years, so extracting these was just a matter of taking some needle nose pliers, giving each a gentle twist and they came right out leaving a clean hole. I replaced each with an oversized piece of stock and CA'd them in place. Once dry, I nipped off the excess with nail clippers.

Back to the bow... ugh...first things first... I had to stabilize the bow rail. It had taken a fairly good impact.


Later I also had to re-glue the anchor stock into its stowed position... after a while it was bugging me.

And now the crushed bridge... there were a few lucky breaks here...

First off, both of the rails for the open air pilothouse were not twisted or mangled. They broke away intact and kept their original shape.

Likewise the mid rail for the wing was also holding most of its original shape...

The upper rail came off exactly in shape. All I really needed to do was replace the mangled uprights and set the rails back into place.


Another lucky thing was the fact that I'd used heavier steel for the three bridge wing supports (arrow). When the impact took place they broke loose, but did not deform. Once the wing platform was back in place, the supports simply dropped through their original holes and I CA'd them in place.

These smashes were more of a cosmetic fix.

They were easily fixed with wood filler and some sanding while the forward bridge work was drying.

Now that the bridge wing was done it was time to fix the open air pilothouse... this would take some improvisation. Hey, I'm Polish, I was born to improvise and adapt stuff...

In order to get the spacing exactly right between the rails I had to create some tools. First were these balsa wood spacers...

The first spacers were simply little blocks to hold up the rail. I'd already placed an over sized upright in each of the original holes on the four corners of the pilothouse roof. I would CA the upright in each corner and let them dry. Then it was time for her to go to the hairdresser...

The spacers for the upper rail had to be the right distance off the roof, plus hold the rail in place. The blocks were so light weight that a sneeze or the slightest bump would knock them out of position. So, I needed to create some little hair pins to hold them in place.


My daughter said it looked like the boat was at the beauty shop getting her hair done.


Adding a few straight pins made it look even more like a beauty shop visit.


Once it was dry I put in oversized upright stock and CA'd them into place. Once dry, I clipped the extra away with my trusty nail clippers.

This was one of those jobs that when I finished I said, "I just cannot wait to paint this" so I did... and it looked great!

Next I needed to replace that stinking aft mast. It was in a hole through the aft cabin overhang and into the deck. First I cut it off level with the rooftop, then I tried to drill it out. Nope, not gonna work. I tried the old twist method in hope that it would break free... not gonna happen. Finally I got ticked off at it and figuring I'd fix whatever damage resulted, I took the needle nose pliers and I snapped it in half!

The dang thing popped out as clean as can be!

I cut off the top portion of the aft mast and its cross "T" and made a paper sleeve to bond that to a new section of dowel for the lower mast. You really have to look to see the repair.

Next the prow strake needed to be rebuilt because the one that broke off was simply gone.
Taking a piece of paper and an engineer's pencil I traced the exact outline of the one on the port side and then used that to make a duplicate out of another stir stick. I then took that piece and boiled it in water to make it flexible. Then clamped it to the curve of the prow to give it the proper shape once it dried out.
Painted it and bingo!

After repainting the roof of the aft cabin I replaced the stack and lifeboat.

Now it was time to glue the steering pole back in its place...

One drop of CD did the trick.

Now she was re-rigged.


Once the rigging was re-strung she was as good as new.

In fact there I did make a change. I replaced the cotton thread with poly because it attracts less dust over they years.

Yet, there was one final detail... I had to add Captain Carelton Graves at the helm. He was the KEYSTONE's long time master. This is the only figure of a person on any of my models.
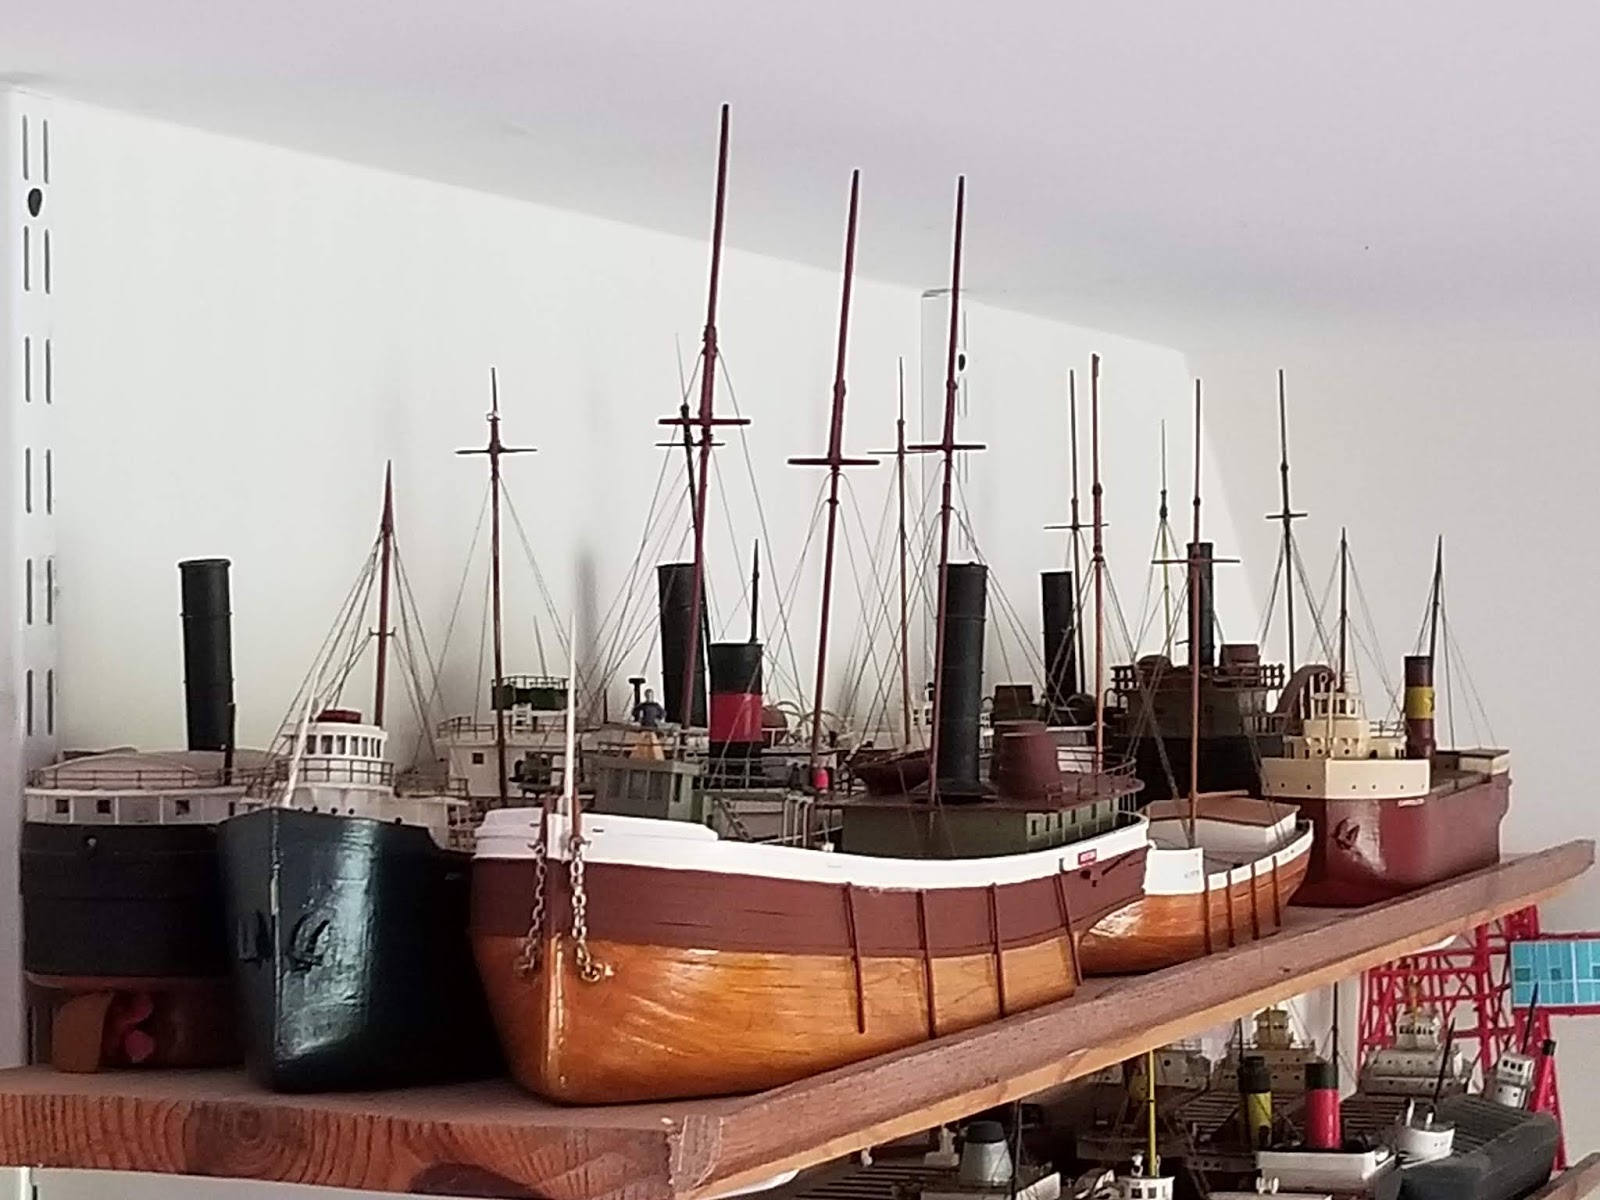
And so once again she takes her place among my fleet...

...with Captain Graves standing a commodore.

To find Wes' books visit
During the lockdown Avery Color Studios is closed
so you can only get his books by way of his web site
but he'll gladly autograph them.
To get his, now out of print "Mysteries and Histories"
go HERE
NEVER pay more than $10 for one of these out of
print books. These third party sellers like to scalp them.
No comments:
Post a Comment